

December 13, 2017
Oven Repair
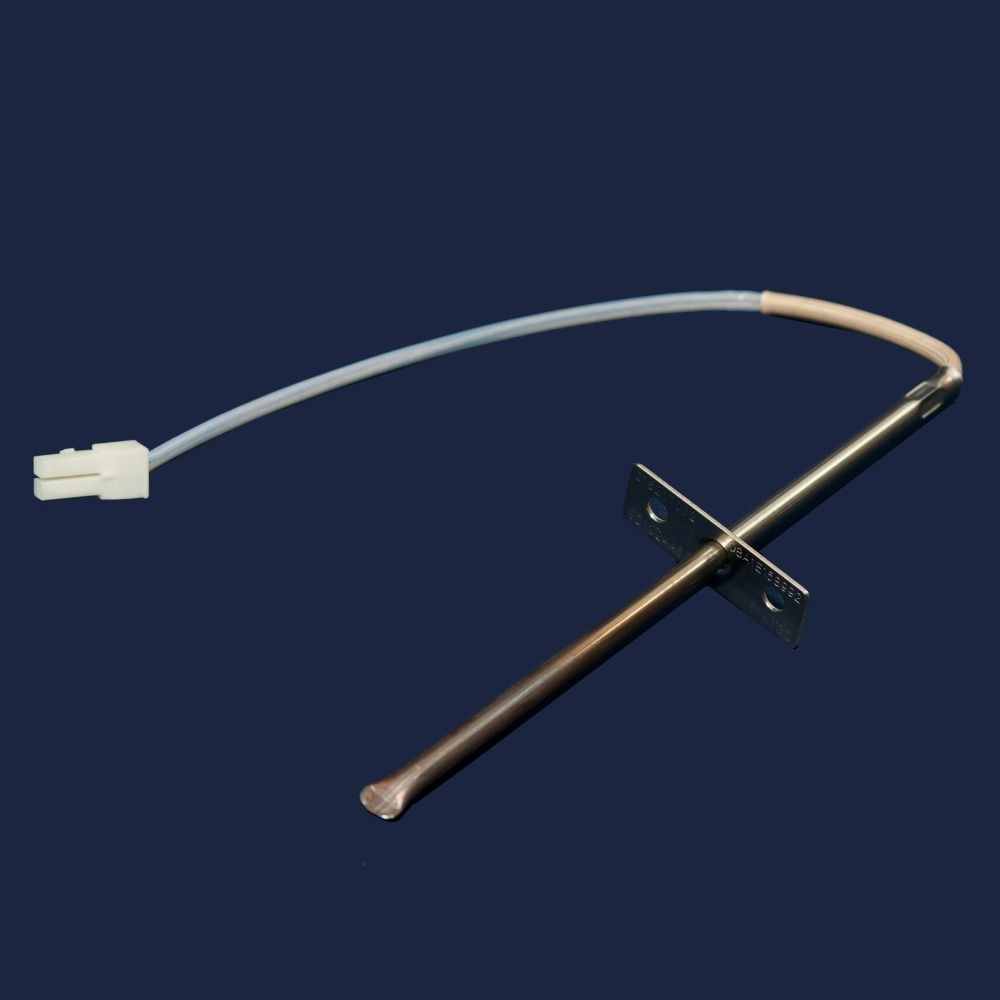
Some common oven problems are hard to diagnose. Unless it’s a clearcut matter of something not powering on or operating properly, it can be difficult to troubleshoot precisely how an oven is malfunctioning. However, one of the most common underlying causes for a gas range oven that isn’t heating properly or evenly is a broken oven sensor. Order the part (part #6322B62214A) if you have an LG gas range and make your repairs by:
- Unplug the oven or disconnect the power. Whenever you’re making any repairs or inspections on your powered appliances, disconnecting it is the first step to avoid both injury and damage to the appliance. This is even more important when handling gas ranges.
- Unscrew the mounting screws holding the sensors in place. This will be in the top right interior corner of your oven, and the sensor is held in place by two Phillips head screws. When you pull the part out towards you, take care of the wire connector so it doesn’t pull free and disconnect other wires.
- Pull the wire connector out and disconnect the wires. Usually, the wires are long enough so you can do this in the hole left behind by the loosened sensor. Sometimes, however, you have to remove the rear access panel to find and safely disconnect the connector without stretching the wires.
- Connect the new sensor’s wires to the connector. If you can only access the wire connector from the rear, feed the new connector from the interior through to the rear.
- Reposition the sensor panel and tighten the screws. Once the wires are connected, the sensor should be usable, so all you need to do is refasten the new sensor into position, plug in your oven, and turn it on to test it.
For more oven repairs and troubleshooting appliance repair tips, go to Appliance Express here.

Apr. 09, 2024
GE Washer Not Spinning? Here’s The Fix!

Apr. 09, 2024
How to Restore Power to Your GE Dishwasher

Apr. 09, 2024
How To Reset Your GE Washer Top Loader

Mar. 06, 2024
Understanding Whirlpool Washer Error Codes

Mar. 06, 2024
JennAir Ice Maker Not Working? Here’s What to Do

Mar. 06, 2024
What to Do If Your LG Fridge Isn’t Cooling

Feb. 05, 2024
Propane vs. Natural Gas Stove: What’s Best?

Feb. 05, 2024
How Hot Does a Dryer Get?

Feb. 05, 2024
LG Dryer Flow Sense: Everything You Need to Know

Jan. 03, 2024
What to Do When Your Freezer Is Not Freezing but the Fridge Is Cold

Jan. 03, 2024
How to Solve Maytag Dishwasher Showing Error F9E1

Jan. 03, 2024
When Is a Microwave Unsafe to Use? (Warning Signs to Look For)

Dec. 11, 2023
How to Fix a Squeaky Dryer (Step-by-Step)

Dec. 11, 2023
How To Remove Ink From Your Dryer

Dec. 11, 2023
How To Fix an LG Microwave Not Heating

Nov. 06, 2023
How To Fix a Maytag Washer Not Spinning

Nov. 06, 2023
KitchenAid Refrigerator Not Making Ice? Here’s Why

Nov. 06, 2023
Whirlpool Microwave Door Error: How to Fix It

Oct. 02, 2023
13 Things to Never Put in the Dishwasher

Oct. 02, 2023
Can You Put Glass in the Microwave?
512 - 819 - 0670Give us a call!