

April 8, 2019
Dryer Repair
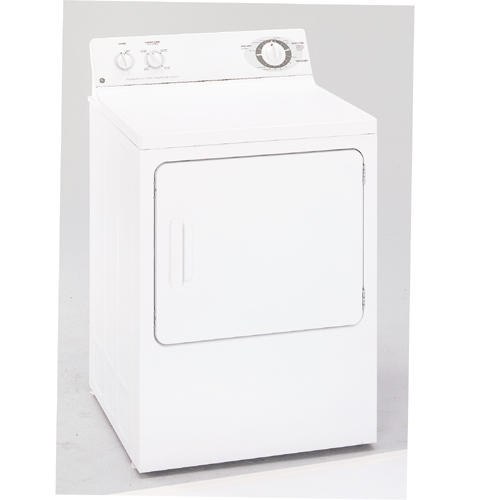
Discovering your electric GE dryer model DBXR453EAWW is no longer producing heat is beyond frustrating, and while a non-heating dryer can indicate a new appliance is needed, more often than not, it simply means a faulty component needs replacing. Although there are a handful of parts that can stop your dryer from heating, two of the most common are a defective heating element and a malfunctioning cycling thermostat. If you believe either part is stopping your dryer from warming up, keep reading to learn how to switch out the faulty part for a new one
The Heating Element Assembly
In your electric dryer, the heating element warms the air before it enters your dryer drum. If the element burns out or a part of the assembly is faulty, the element won’t function properly, meaning the air coming into the drum won’t heat up. Testing the heating element with a multimeter will tell you whether or not the part has continuity. If it’s lacking continuity, the element requires replacing.
How to Replace the Heating Element Assembly in Your GE Electric Dryer
- Open up your dryer door, and unthread the screws at the top of the door lip. Once you have removed both screws, grab the edges of the dryer’s top panel and lift it up to release the locking mechanisms holding it in place. Then, remove the top panel from your dryer.
- Now you’ll want to detach the dryer’s front panel. To do so, unthread the screws on the backside of the front panel. After the screws are out, tilt the panel back and lift it up, slightly. Then, swing the panel to the side so you can disconnect the door switch harness. Before you can reach the switch, push the small metal panel covering it down. With the metal panel out of the way, pull the door switch wire harness apart. Now you can remove the front panel from the dryer.
- At this point, you’ll want to take the dryer drum out of the dryer cabinet. To make this process easier, unthread the two screws that hold the side panels and the blower housing together. Once the screws are out, the side panels should flex a bit more, which will provide you with more room to slide the drum out.
- Before you can remove the drum, reach under it and take the drive belt off the idler pulley and the drive motor pulley. Then, stand up and grab hold of the drive belt and use it to guide the drum out of the dryer cabinet.
- With the dryer drum removed, you can see the heating element assembly on the back wall of your appliance. On the lip of the assembly, you’ll find the thermal fuse and the high limit thermostats. To remove the fuse and thermostats, use a Phillips screwdriver to unthread the screws securing the parts to the heating assembly. You do not need to disconnect the wires from the fuse and thermostats. Instead, allow them to hang while you remove and replace the heating element.
- Locate the wires near the bottom of the element, and snap a photo of them to make sure you know which wire belongs to which terminal during reassembly. Once you’ve taken the photo, disconnect the wires.
- Now that the wires are no longer attached to the element, you can start unthreading the screws holding the heating element assembly to the back of the dryer cabinet. After you have removed the final screw, lift the assembly off the rear wall and out of your dryer.
- Grab your new heating element assembly, and align it with the screw holes on the back wall of your dryer. Before you start to secure the part, make sure the wire terminals on the assembly are located at the bottom of the component. After the heating element assembly is lined up correctly, secure it to the dryer wall with the screws you took out previously.
- Take a look at the picture you took earlier to remind yourself of the proper wire connections. Then, reconnect the wires to their terminals.
- After the heating element wires are secure, reattach the thermal fuse and the thermostats to the lip of the assembly.
- With the new heating element assembly installed, you can begin reassembling your dryer. To do so, retrieve the dryer drum and carefully place it back inside the dryer cabinet. Make sure the shaft of the drum is inserted into the small opening in the center of the heating element assembly. Once the drum is in place, reach underneath it and rethread the belt around the idler pulley and the drive motor pulley in a Z-formation.
- Replace the screws which hold the side panels and the blower housing together. Then, retrieve the front panel and reconnect the wires to the door switch. Once the wires are connected, rotate the panel and reattach it to the front of your dryer cabinet. Add the screws you removed earlier to secure the panel to your appliance.
- To finish up the reassembly process, place the dryer’s top panel back on the appliance, and then open the dryer door to reattach the screws that hold the panel in place.
- Now that you’ve installed a new heating element assembly, plug-in your dryer and turn its water supply back on before testing out the new component.
The Cycling Thermostat
The cycling thermostat regulates the temperature in your dryer by switching the heat on and off. If the thermostat fails, the heating element won’t turn on and the air entering your dryer drum will not warm up. You will need to replace the cycling thermostat to fix the problem.
How to Replace the Cycling Thermostat in Your Dryer
- In order to reach the cycling thermostat, you’ll need to take off the top and front panel of your dryer, and remove the dryer drum. To do so, follow steps 1 through 4 in the heating element repair guide provided above.
- Once you’ve finished disassembling your dryer, you’ll find the cycling thermostat on the side of the blower housing. Using a flat head screwdriver, carefully pry off the wires running to the thermostat. Then, unthread the screw securing the part to the housing and remove the faulty thermostat from your dryer.
- To install your new cycling thermostat, simply place it on the blower housing and secure it with the screws you removed earlier, and then reconnect the wires that run to the part.
- After the new cycling thermostat is installed, reinsert the dryer drum and rethread the drive belt around the idler pulley and the drive motor pulley in a Z-formation.
- With the drum replaced, reattach the screws you took out of the side panels. Then grab the front panel and reconnect the door switch wire harness to the panel. Next, reinstall the front panel, securing it with the screws you took out. Finally, place the top panel back on your appliance and open your dryer door to rethread the screws used to hold the top panel in place.
- To complete your repair, plug-in your appliance and turn on its water supply.
If you’re having a hard time troubleshooting your non-heating dryer, please contact us today, and one of our highly skilled appliance repair technicians will be happy to help you diagnose and replace the malfunctioning component.

Apr. 09, 2024
GE Washer Not Spinning? Here’s The Fix!

Apr. 09, 2024
How to Restore Power to Your GE Dishwasher

Apr. 09, 2024
How To Reset Your GE Washer Top Loader

Mar. 06, 2024
Understanding Whirlpool Washer Error Codes

Mar. 06, 2024
JennAir Ice Maker Not Working? Here’s What to Do

Mar. 06, 2024
What to Do If Your LG Fridge Isn’t Cooling

Feb. 05, 2024
Propane vs. Natural Gas Stove: What’s Best?

Feb. 05, 2024
How Hot Does a Dryer Get?

Feb. 05, 2024
LG Dryer Flow Sense: Everything You Need to Know

Jan. 03, 2024
What to Do When Your Freezer Is Not Freezing but the Fridge Is Cold

Jan. 03, 2024
How to Solve Maytag Dishwasher Showing Error F9E1

Jan. 03, 2024
When Is a Microwave Unsafe to Use? (Warning Signs to Look For)

Dec. 11, 2023
How to Fix a Squeaky Dryer (Step-by-Step)

Dec. 11, 2023
How To Remove Ink From Your Dryer

Dec. 11, 2023
How To Fix an LG Microwave Not Heating

Nov. 06, 2023
How To Fix a Maytag Washer Not Spinning

Nov. 06, 2023
KitchenAid Refrigerator Not Making Ice? Here’s Why

Nov. 06, 2023
Whirlpool Microwave Door Error: How to Fix It

Oct. 02, 2023
13 Things to Never Put in the Dishwasher

Oct. 02, 2023
Can You Put Glass in the Microwave?
512 - 819 - 0670Give us a call!