

July 19, 2023
Dryer Repair
Cleaning the lint trap in your dryer should be essential to your laundry cycle. Regularly cleaning not only keeps your home safe from fire hazards, but it also helps keep your dryer running well and reduces your energy bills. But do you know the correct way to clean a dryer lint trap?
Details matter when caring for this simple but critical household chore; otherwise, you can cause more problems than solutions!
Read on to find out how to clean a dryer lint trap properly so that you can help protect your family from fire hazards and save money and hassle at the same time.
Why should I clean my dryer’s lint trap?
As you go about your laundry routine, it can be easy to overlook the lint trap tucked away in the depths of your dryer. However, neglecting this small but essential component can lead to big problems. Over time, a lint buildup can hinder your dryer’s performance, causing longer drying times and even potential fire hazards. That’s why it’s crucial to take the time to remove the lint trap and clear it of any visible debris before each load. This helps keep your dryer running smoothly and gives you peace of mind knowing that you’ve taken steps to keep your home safe.
How to clean a dryer lint trap properly
1. Make sure the dryer is empty before cleaning the lint trap.
Cleaning your dryer’s lint trap is a simple task. However, before you begin, it’s important to make sure that the dryer is completely empty. Neglecting to do so could lead to more debris, such as a sock, getting caught in the lint trap and potentially causing a fire hazard. Another potential outcome, though not dangerous but annoying, is getting even more lint on your clothes!
Once you’ve double-checked and confirmed that the dryer is empty, you can proceed with cleaning the lint trap.
By taking this extra precaution, you can protect your home and family from potential dangers and ensure your dryer runs smoothly for years.
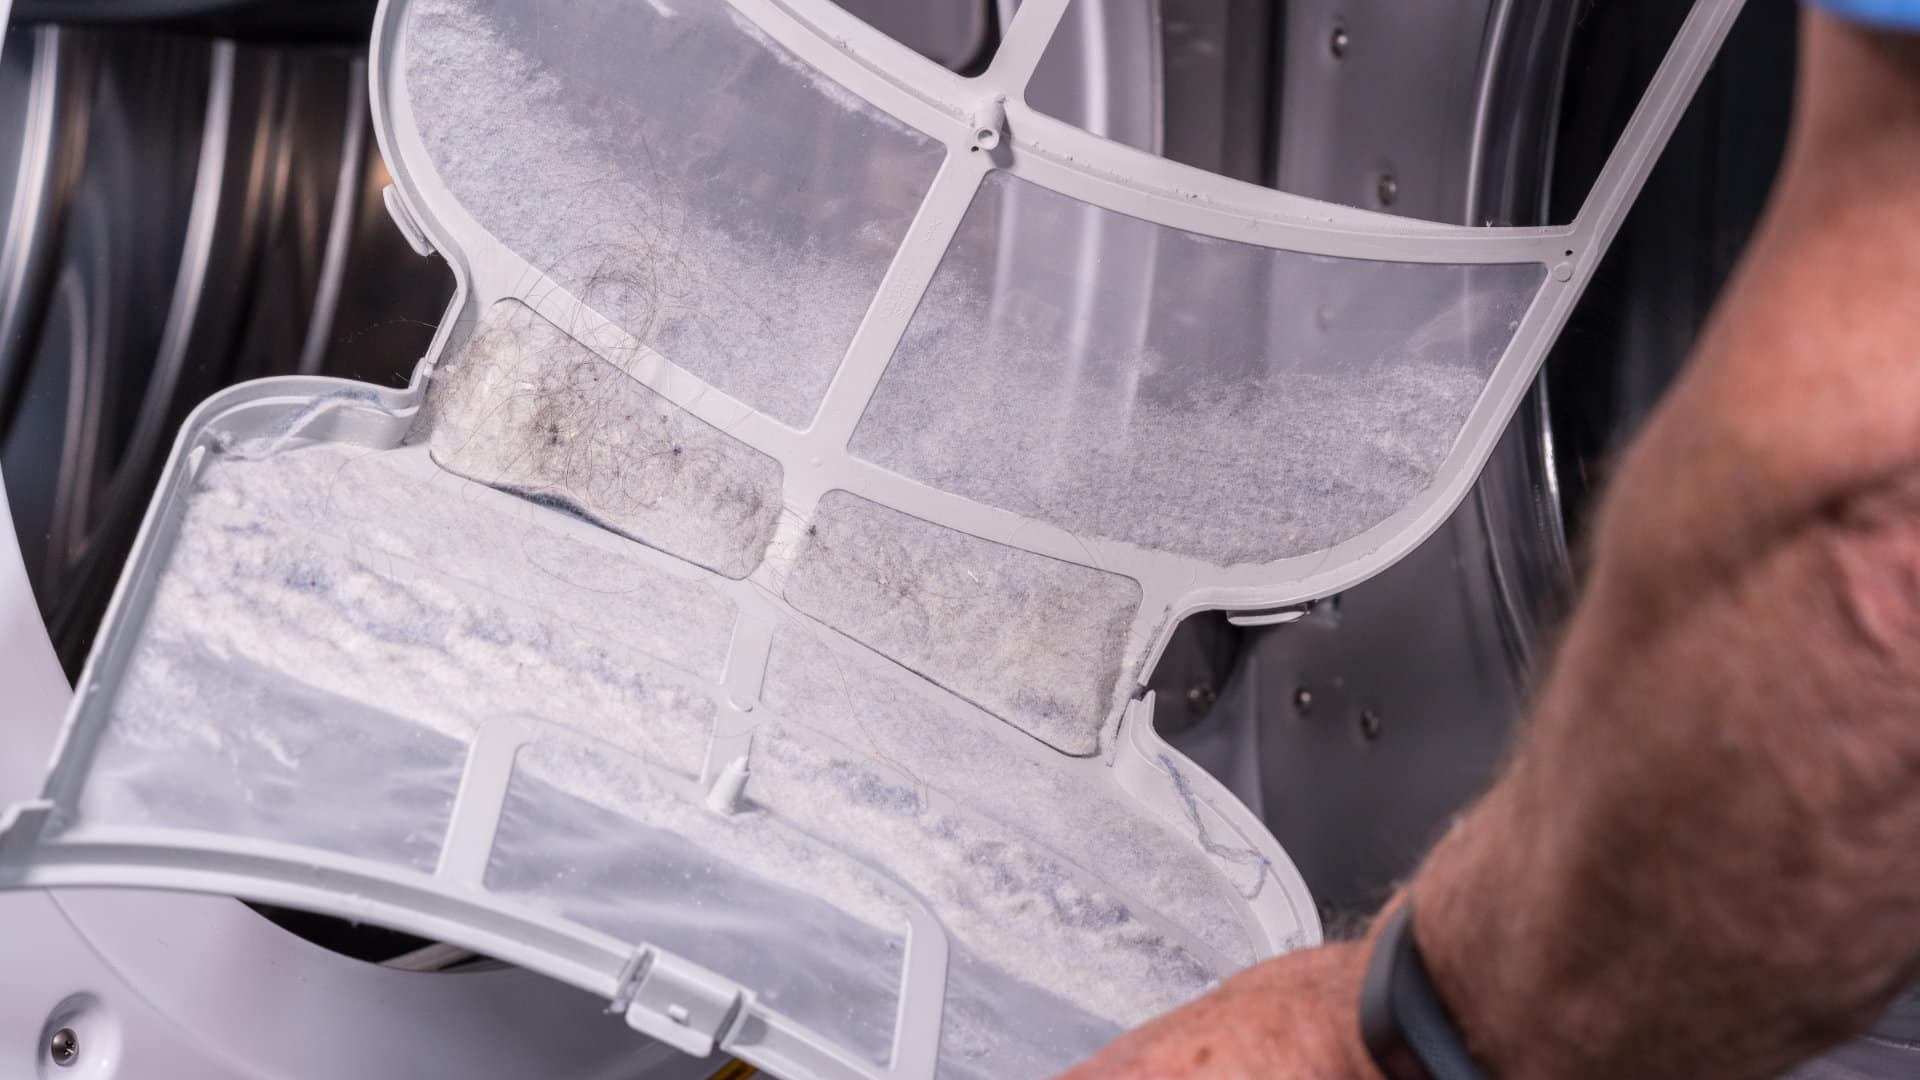
2. Locate the lint trap, remove it, and empty any visible lint into a garbage bin.
Now that you know the dryer is clear, you can proceed with emptying the lint trap.
The first step is to locate the lint trap on your particular model.
On front loader dryers, the lint trap is usually located just inside the door, along the door frame, at the bottom.
On top of loader dryers, the lint trap may be located inside the door or on top of the dryer, near the controls in a separate slot.
Combination washer–dryers frequently don’t have a lint trap. These wash the lint away along with the water during the drain cycle.
Regardless of where it is on your dryer, the process for emptying the lint trap is the same. Pull out the lint trap, using a light pinching pressure to release the catch and tugging gently. The lint trap should come out easily.
If you have a front loader dryer, the trap should open like a book.
If you have a top loader dryer, your lint trap will be a single, thin screen.
From here, clean the lint off the trap; you can do this by hand, with a brush, or even a vacuum for a thorough clean. Be sure to get all of the nooks and crannies.
Be sure to empty the lint trap between every dryer cycle! Lint builds up fast and can become a fire hazard quickly.
3. Replace the lint trap in the dryer.
Now you can replace the lint trap in the dryer. For front loaders, fold the lint trap until it locks, then slide it back into its housing at the bottom of the dryer door frame.
For top loaders, slide your lint trap back into its housing, ensuring the handle is upright and facing you. From there, you can close the door.
Continue reading for tips on a deeper clean.
How to get rid of any lint from inside the lint trap housing for deeper cleaning
Have you ever noticed that even after your clothes are “dry,” they still seem to have a bit of lint sticking to them? Fear not for there is a solution!
Sometimes lint slips through the cracks around the lint trap and gets carried down into the dryer.
To give your dryer a deeper clean. With the lint trap removed, you can vacuum the trap housing to get all the escaped dryer lint.
You may even find a sock or two, as they occasionally slip past the filter.
If you don’t have a vacuum with a hose or attachment that fits into the slot, you can purchase a dryer cleaning brush (frequently found in dryer vent cleaning kits). These long, billowy brushes can get into the small spaces and remove the excess lint.
Not only will it leave your clothes looking cleaner and more polished, but it can also help extend the life of your dryer by preventing clogs and overheating issues. You should try and do a deeper clean like this every few months.
Cleaning the dryer vent for extra safety
When it comes to laundry, we often focus on washing our clothes and forget the importance of maintaining our dryer. Regularly cleaning your dryer vent extends your machine’s life and enhances your home’s safety. A neglected dryer vent can quickly become clogged with lint, making it highly inflammable.
But cleaning your dryer vent is relatively easy.
Move the dryer away from the wall and unplug it.
Locate the dryer vent (the long, wrinkly, silver tube at the back) and disconnect both ends from the dryer and wall, respectively. You may need pliers to undo the clasps securing the vent.
Be sure the vent is free from damage and isn’t crushed or kinked. Otherwise, it will need to be replaced.
From here, you can clean it out with a vacuum or use the brush from a dryer vent cleaning kit.
Be sure to clear out the vent at the wall, too, as lint can build up there over time.
Replace the hose and ensure it fits snugly over the connections at the dyer and wall. Secure the clamps and move the dryer back into position, ensuring not to crush or kink the vent. Finally, plug the dryer back in.
Clean out the dryer vent every six months or so.
Keeping your dryer lint-free is important for home maintenance, especially for preventing potential fires. Not only does it help reduce the risk of fire, but it can also improve your dryer’s overall performance and lifespan.
With just a few minutes, you can easily complete this task in no time. You must maintain regular cleanup of the lint traps and vent if you want to avoid problems in the future. So make sure to set aside some time to clean your dryer after every cycle, and clean it thoroughly every now and again, and keep it working well and safely. It’s more than worth the effort!

Apr. 09, 2024
GE Washer Not Spinning? Here’s The Fix!

Apr. 09, 2024
How to Restore Power to Your GE Dishwasher

Apr. 09, 2024
How To Reset Your GE Washer Top Loader

Mar. 06, 2024
Understanding Whirlpool Washer Error Codes

Mar. 06, 2024
JennAir Ice Maker Not Working? Here’s What to Do

Mar. 06, 2024
What to Do If Your LG Fridge Isn’t Cooling

Feb. 05, 2024
Propane vs. Natural Gas Stove: What’s Best?

Feb. 05, 2024
How Hot Does a Dryer Get?

Feb. 05, 2024
LG Dryer Flow Sense: Everything You Need to Know

Jan. 03, 2024
What to Do When Your Freezer Is Not Freezing but the Fridge Is Cold

Jan. 03, 2024
How to Solve Maytag Dishwasher Showing Error F9E1

Jan. 03, 2024
When Is a Microwave Unsafe to Use? (Warning Signs to Look For)

Dec. 11, 2023
How to Fix a Squeaky Dryer (Step-by-Step)

Dec. 11, 2023
How To Remove Ink From Your Dryer

Dec. 11, 2023
How To Fix an LG Microwave Not Heating

Nov. 06, 2023
How To Fix a Maytag Washer Not Spinning

Nov. 06, 2023
KitchenAid Refrigerator Not Making Ice? Here’s Why

Nov. 06, 2023
Whirlpool Microwave Door Error: How to Fix It

Oct. 02, 2023
13 Things to Never Put in the Dishwasher

Oct. 02, 2023
Can You Put Glass in the Microwave?
512 - 819 - 0670Give us a call!