

February 10, 2020
Oven Repair
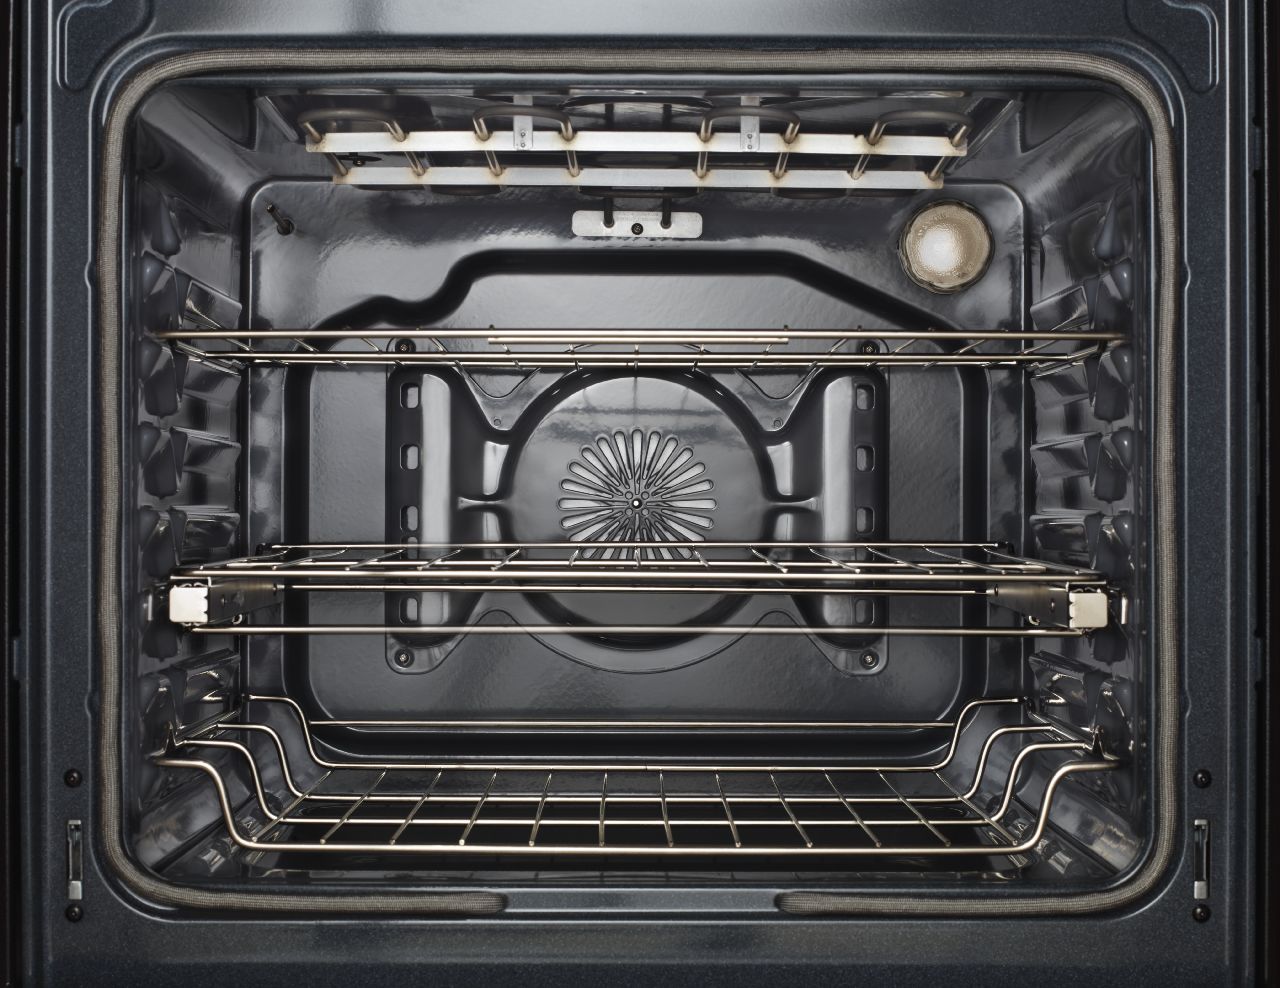
In most ovens, the elements are both exposed and visible. Both the top and bottom elements can clearly be seen if you peer into the oven. You can see them glow and judge how well they’re working based on the glow. But not all ovens are built like this. With some ovens, the bake element is hidden. The heat still disperses evenly but the element itself is hidden beneath the bottom plate of the oven. You may have a hidden broil element as well, but this is even less common. A hidden bake element is considered a cleaner, more attractive design for an oven but it’s not impossible to work with. If your baking results have shown that the bake element is not working correctly, you may need to tackle a hidden element replacement. You can tell if your casseroles and cakes bake unevenly or if there seems to no heat coming from the lower element at all.
This guide will help you replace your hidden and non-functional bake element.
Warm the Oven
Performing repairs on electric heating elements have an interesting challenge. They tend to shatter when cold. So there’s an interesting approach to carefully replacing your oven element without shattering the element or burning yourself. You need to warm up the oven just a little bit before unplugging it and getting to work.
So warm up your oven. Set it to the lowest possible setting and let it warm for no more than five minutes. Then turn the oven off. This will make your next steps easier.
Wear work gloves just in case.
Safety Precautions
Your next step is to unplug the oven to ensure there is no electric current flowing through the element when you uninstall it. An electric oven with a hidden baking element can shock you if you try to remove it while the oven is still plugged in. If you can’t reach the plug for your oven because it is hidden, you can also flip the kitchen breaker.
Remove the Bottom Panel
The hidden element is underneath the lower panel inside your oven compartment. Start by removing the oven racks, carefully setting them aside. If you have a friend, this is a good time to soak and clean your oven racks.
Next, use a nut driver to remove the lower panel inside the oven. Carefully extract each screw and then lift the bottom panel out of the oven and set it aside on a towel nearby. If your bottom panel is dirty, this is a good time to clean it, too.
Remove the Bake Element
You will now be able to see your hidden bake element. Removing it is a multi-step process and you should be careful. First, make sure it is neither cold nor too hot to touch. Be careful in testing its temperature.
Next, unscrew the mounting brackets that hold the hidden bake element in place. There are likely brackets and/or screws located below the element and fastening it to the back of the oven.
When all the screws and brackets are removed, the element should wiggle when you touch it and you can pull it away from the back oven wall. You will notice wires that were once inside the oven wall or inside the hollow element. The wires will be connected by a wire harness clip. Unfasten the clip on either side of the element and pull your old element out to throw away. Do not let the wire clips fall back into the oven housing.
Install the New Bake Element
Now grab your new replacement element, chosen because it perfectly matches the replacement part number in the manual for your oven. Start by setting the replacement element in position and connect the wire harness clips on either side. Make sure they click in securely before moving on.
Next, reattach all the brackets and screws. Ideally, you will have gotten a new set of fastening hardware with your element. If not, use the set you just removed from the previous element. Take your time and mount the element in securely at all points.
Return the Bottom Panel
Once you’re sure the element is secure, grab your oven bottom panel and fit it into place. Secure it with the screws you removed and, once again, make sure it is secure. You’re almost done.
Test Your Success
Now you’re ready to set your oven back up and find out if your replacement element work was successful. Return the oven racks to your oven, careful to place them at the spacing you prefer most for cooking. Then plug your oven back in or flip the breaker to return power to the oven.
Finally, because you can’t see the element to do the glow-test, the best test is to bake something. A casserole or a wide cake is your best bet to find out if your element is providing strong and even heat. A metal oven thermometer will tell you if the oven is reaching optimal temperatures and the quality of your baked item will tell you if the element is heating evenly.
What to Do if the Element Shatters
If the heating element shatters in your hands, hopefully, you were wearing work gloves. But don’t worry. You were going to throw away that heating element anyway. The element shatters because it is has gone through extreme heating cycles. Don’t worry. Instead, use a rag or old towel to sweep up the shattered pieces. A small dustpan can be very helpful for removing all the pieces of shattered elements. Then simply disconnect the wires and remove the rest of the old element and continue with the repair.
—Installing a new electric oven heating element is one of the easiest repairs you can perform on your oven if the element doesn’t shatter. But if there is trouble with your oven beyond replacing an element, then you may want to call for the assistance of an appliance repair technician. contact us whether you’d like more detailed repair guides or the help of a technician.

Apr. 09, 2024
GE Washer Not Spinning? Here’s The Fix!

Apr. 09, 2024
How to Restore Power to Your GE Dishwasher

Apr. 09, 2024
How To Reset Your GE Washer Top Loader

Mar. 06, 2024
Understanding Whirlpool Washer Error Codes

Mar. 06, 2024
JennAir Ice Maker Not Working? Here’s What to Do

Mar. 06, 2024
What to Do If Your LG Fridge Isn’t Cooling

Feb. 05, 2024
Propane vs. Natural Gas Stove: What’s Best?

Feb. 05, 2024
How Hot Does a Dryer Get?

Feb. 05, 2024
LG Dryer Flow Sense: Everything You Need to Know

Jan. 03, 2024
What to Do When Your Freezer Is Not Freezing but the Fridge Is Cold

Jan. 03, 2024
How to Solve Maytag Dishwasher Showing Error F9E1

Jan. 03, 2024
When Is a Microwave Unsafe to Use? (Warning Signs to Look For)

Dec. 11, 2023
How to Fix a Squeaky Dryer (Step-by-Step)

Dec. 11, 2023
How To Remove Ink From Your Dryer

Dec. 11, 2023
How To Fix an LG Microwave Not Heating

Nov. 06, 2023
How To Fix a Maytag Washer Not Spinning

Nov. 06, 2023
KitchenAid Refrigerator Not Making Ice? Here’s Why

Nov. 06, 2023
Whirlpool Microwave Door Error: How to Fix It

Oct. 02, 2023
13 Things to Never Put in the Dishwasher

Oct. 02, 2023
Can You Put Glass in the Microwave?
512 - 819 - 0670Give us a call!