

May 6, 2019
Refrigerator Repair
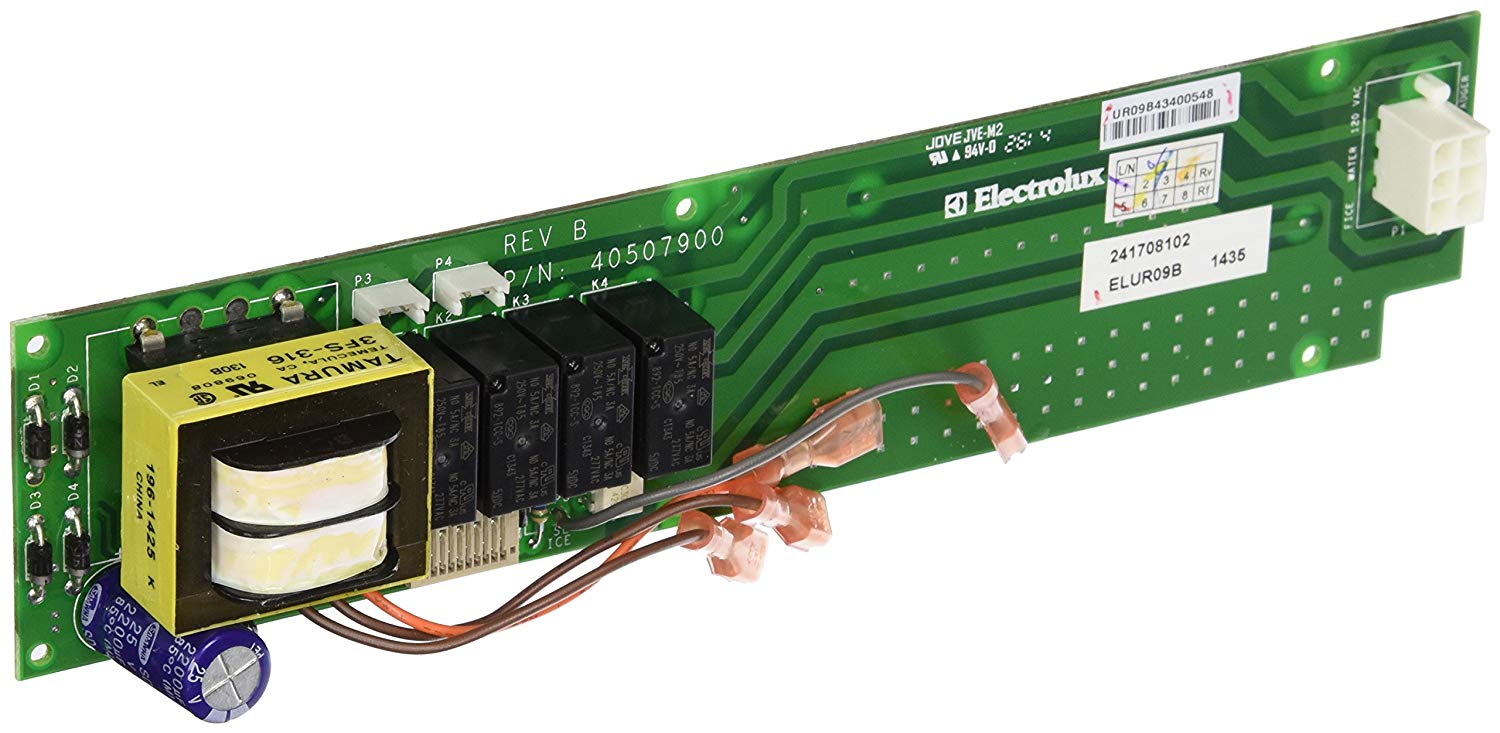
The control board inside your freezer section door handles all of the functions for your ice and water dispenser. This includes turning the ice and water on and off, stopping the water inlet valve, switching the ice settings, and controlling the lights. If one or more of your dispenser settings don’t work, you can install a new control board on your own. Order part #241708102 for your Frigidaire refrigerator. Then follow these steps:
1. Unplug the refrigerator.
Before you uninstall or install any new parts in an appliance, make sure it’s unplugged instead of simply turned off. This is even more important when you will be disconnected wires.
2. Disassemble the freezer door exterior to access the control board.
First, remove the freezer section door handle. Open the refrigerator door so you can loosen the set screws at the top and bottom of the freezer handle. Once the screws are loose (but not removed), you can pull the handle away and set it aside.
Next, pull the drip tray out of the basin at the bottom of the ice dispenser. Then remove the frame. To do this, loosen and remove the three screws and the bottom of the frame. Now you can lift the whole frame up to release it from the top hooks. Flip it over and pull the ribbon connector from the control board so the frame is completely separate. Set it aside.
Locate the green control board. Remove the three screws along the top edge. The screws also hold the clear plastic board protector, so hold it in place. Set it aside once it’s loose. Remove the three screws along the bottom edge of the control board, too, and be prepared to hold onto the control board so it doesn’t hit anything while it’s loose. Tilt it slightly forward and locate the white wire harness on the left side of the back. Depress the tabs and unplug that one wire connector.
3. Take a picture of the wiring before you continue.
Take a picture of the remainder of the wires so you have a wiring guide for reinstallation and assembly. Take note of the two small wire harnesses toward the front which each have a red and black wire attached to them. Trace the wires back to their position in the refrigerator (left on the left and right on the right) so you remember the orientation during reassembly. The same pattern (left on the left and right on the right) holds true for the brown wires that clip to the back. The gray wire connects to the ice dispenser circuits toward the center of the board, and the orange one connects to the water dispenser circuit. These will often be labeled on the control board.
red and black wire attached to them. Trace the wires back to their position in the refrigerator (left on the left and right on the right) so you remember the orientation during reassembly. The same pattern (left on the left and right on the right) holds true for the brown wires that clip to the back. The gray wire connects to the ice dispenser circuits toward the center of the board, and the orange one connects to the water dispenser circuit. These will often be labeled on the control board.
While knowing the configuration of wires helps, taking a picture before you get started means you can rely on the image for greater peace of mind.
4. Remove the circuit board.
First, pry away the front two wire harnesses with the red and black wires away from the circuit board. Next, unplug the brown, gray, and orange wire harnesses from the frame inside the door. Those wires “belong” to the circuit board, so don’t try to detach them from there. As you disconnect the last harness, hold onto the control board so it doesn’t fall.Once the control board is out of the way, you can bend the wires to the left and right for easier organization during installation. While the wires aren’t stiff, they will partially hold the movement.
5. Install the new control board.
First, install the wires that belong to the circuit board. Plug the brown wires in, working from left to right. Also, plug the gray (ice dispenser) wire plug onto the left port behind the brown wires. The orange wire gets plugged into the right port behind the brown wires. Your configuration should look like:
Gray | OrangeBrown | Brown
Next, install the red and black wire harnesses from the refrigerator to the control board. Connect them left to left and right to right. The harnesses themselves should both be oriented so the black wire is on the left and the red wire is on the right.
Then plug in the larger white wire harness on the left side of the control board.
6. Reassemble the freezer door.
First, position the control board against the top of the cavity. It should slightly click into place, even though it won’t be completely secure.Next, install the three screws along the bottom edge of the control board. Position the clear plastic shield against the control board so that:
- The holes line up against the screw holes along the top of the control board.
- The small horizontal cut near the bottom center is on the right half of the cover.
Tighten the top three screws so the plastic cover is sandwiched between them and the board.
Once the control board is secure, pick up the frame and hold it close to the control board. Feed the ribbon wire into the slot between the second and third bottom screw. There will also be a cut through the protective cover so you have access.
After that, hook the top of the frame against the three slots above the cavity. Push it down when it’s flush against the refrigerator to make it click into place. Then add back the three screws along the bottom of the dispenser frame. Reinstall the drip tray to cover the screws.
Then open the refrigerator door so you can reinstall the freezer section handle. Line up the handle with the two posts in the door. Hold it in place as you tighten the set screws so the handle is secure and flush with the door face.
Plug your refrigerator back in and test the new control board. All of the functions should be operating perfectly.
Go to Appliance Express for more repair guides and installation tips. You can also schedule a service call with our trained technicians for complex repairs.

Apr. 09, 2024
GE Washer Not Spinning? Here’s The Fix!

Apr. 09, 2024
How to Restore Power to Your GE Dishwasher

Apr. 09, 2024
How To Reset Your GE Washer Top Loader

Mar. 06, 2024
Understanding Whirlpool Washer Error Codes

Mar. 06, 2024
JennAir Ice Maker Not Working? Here’s What to Do

Mar. 06, 2024
What to Do If Your LG Fridge Isn’t Cooling

Feb. 05, 2024
Propane vs. Natural Gas Stove: What’s Best?

Feb. 05, 2024
How Hot Does a Dryer Get?

Feb. 05, 2024
LG Dryer Flow Sense: Everything You Need to Know

Jan. 03, 2024
What to Do When Your Freezer Is Not Freezing but the Fridge Is Cold

Jan. 03, 2024
How to Solve Maytag Dishwasher Showing Error F9E1

Jan. 03, 2024
When Is a Microwave Unsafe to Use? (Warning Signs to Look For)

Dec. 11, 2023
How to Fix a Squeaky Dryer (Step-by-Step)

Dec. 11, 2023
How To Remove Ink From Your Dryer

Dec. 11, 2023
How To Fix an LG Microwave Not Heating

Nov. 06, 2023
How To Fix a Maytag Washer Not Spinning

Nov. 06, 2023
KitchenAid Refrigerator Not Making Ice? Here’s Why

Nov. 06, 2023
Whirlpool Microwave Door Error: How to Fix It

Oct. 02, 2023
13 Things to Never Put in the Dishwasher

Oct. 02, 2023
Can You Put Glass in the Microwave?
512 - 819 - 0670Give us a call!