

June 11, 2018
Oven Repair
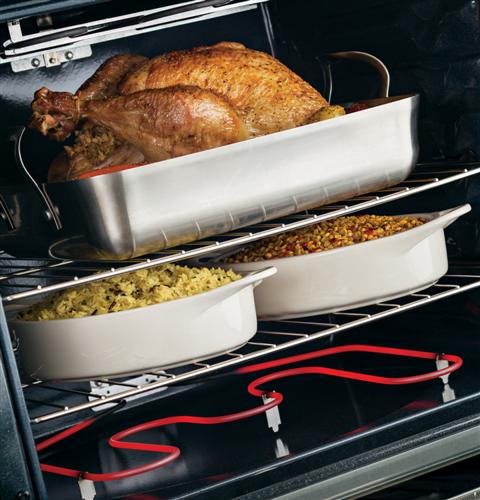
You depend on your GE oven to help prepare the delicious homemade meals your family craves after a long day spent at work and school. Unfortunately, when your oven refuses to heat, your nightly dinner plans are put on the back burner while you try to troubleshoot and diagnose your appliance’s malfunction. If this scenario sounds familiar, don’t worry, we can help you. In many cases when an oven is no longer heating, a burnt out bake element is the issue. Luckily, diagnosing and replacing the bake element in your GE oven model JBS10DFCC is not a complicated repair. To help you get started, we’ve provided an easy to follow how-to-guide below.
How to Inspect the Bake Element
Determining whether or not the bake element in your oven is malfunctioning is simple. If your oven is on and the bake element, which is located at the bottom of your appliance, is not glowing red, it is most definitely not functioning properly. You can also inspect the part for noticeable breaks and blisters while your oven is off. Both blemishes indicate the bake element is no longer operating as it should.
How to Replace the Bake Element in Your GE Oven
Before starting the repair, unplug your oven from the wall or turn the appliance off at the circuit breaker. For your safety, please wear work gloves and safety goggles while replacing the bake element.
-
Open your oven door and remove both oven racks. Once the racks are out of the way, you will have a clear view of the bake element.
-
To disconnect the bake element from the back of the oven wall, you will need to remove the two screws holding it in place with a Phillips screwdriver. Remember to place the screws somewhere safe before moving on to the next step.
-
Once the screws are taken out, slightly pull the bake element away from the oven wall. Next, you will need to disconnect the two wires linking the bake element to the appliance. After the wires are removed from the terminals, do not allow them to fall back into the oven. If the wires do drop back into the appliance, you will need to pull the oven away from the wall and remove the back panel to find the missing wires.
-
After you have disconnected the wires from the malfunctioning bake element, you can completely remove the part from the oven and replace it with a new bake element. To connect the new element, attach the wires to the new part. Once the wires are secured properly, push the element back into place and reattach the two screws you removed earlier.
-
Finally, place the racks back into your oven and turn on the circuit breaker to test the newly installed bake element.
If your oven is still not heating after you replaced the bake element, please contact us today and one of our trusted appliance repair technicians will come to your home to diagnose and fix the malfunction.

Apr. 09, 2024
GE Washer Not Spinning? Here’s The Fix!

Apr. 09, 2024
How to Restore Power to Your GE Dishwasher

Apr. 09, 2024
How To Reset Your GE Washer Top Loader

Mar. 06, 2024
Understanding Whirlpool Washer Error Codes

Mar. 06, 2024
JennAir Ice Maker Not Working? Here’s What to Do

Mar. 06, 2024
What to Do If Your LG Fridge Isn’t Cooling

Feb. 05, 2024
Propane vs. Natural Gas Stove: What’s Best?

Feb. 05, 2024
How Hot Does a Dryer Get?

Feb. 05, 2024
LG Dryer Flow Sense: Everything You Need to Know

Jan. 03, 2024
What to Do When Your Freezer Is Not Freezing but the Fridge Is Cold

Jan. 03, 2024
How to Solve Maytag Dishwasher Showing Error F9E1

Jan. 03, 2024
When Is a Microwave Unsafe to Use? (Warning Signs to Look For)

Dec. 11, 2023
How to Fix a Squeaky Dryer (Step-by-Step)

Dec. 11, 2023
How To Remove Ink From Your Dryer

Dec. 11, 2023
How To Fix an LG Microwave Not Heating

Nov. 06, 2023
How To Fix a Maytag Washer Not Spinning

Nov. 06, 2023
KitchenAid Refrigerator Not Making Ice? Here’s Why

Nov. 06, 2023
Whirlpool Microwave Door Error: How to Fix It

Oct. 02, 2023
13 Things to Never Put in the Dishwasher

Oct. 02, 2023
Can You Put Glass in the Microwave?
512 - 819 - 0670Give us a call!